Maratas, the City in the Stone (WIP)

I found an interesting Rayya’s seed that was basically one big giant rock, so I’ve been hollowing it out and building on it.
The process has involved a few interesting technical challenges so I thought it might be worth sharing for those interested in big-project builds, and I haven’t seen a major build yet with Rayya’s (there may be some, I just haven’t seen them!)

The initial hollowing-out work took me basically through to the start of Rainmun, then building the tower on top took an additional month (and about 24 hours of played time, due to an assortment of bugs), then some fortress walls on the exterior; at this stage i’ve finally just about finished all the detailed carving of the interior (stairs, etc.) and am ready to start building the city inside the rock.

Anyway, at this stage, here are some screenshots from development so far:

The initial seed:

http://images.akamai.steamusercontent.com/ugc/299860700362657295/EBCD1E3D120C8D31906458004CB940D27083095E/

The first day:

Just to show you how tall this thing is, in blocks:

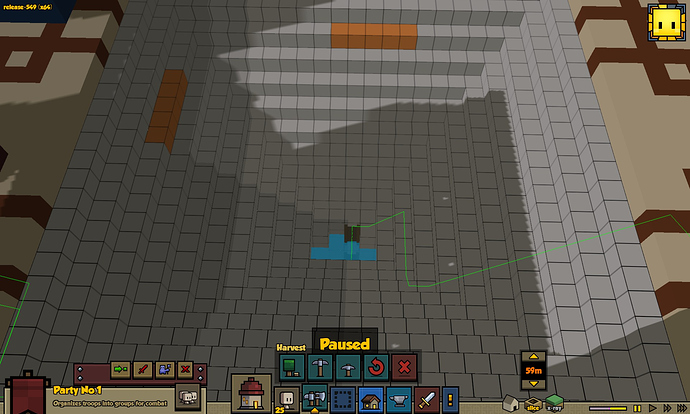
I started by putting a nice big mosaic on the top to help me line everything up correctly, then dug down through the center and started hollowing out the mountain.

http://images.akamai.steamusercontent.com/ugc/299860700343959852/3BDD75AEE50C0B63552C128C946532D6E1C223D3/

The hardest part of the hollowing process was carving the stairs. At first I was trying to just move a block “over” to the right every step, for gradual widening, but once I got further down and had more room to work I realized it was better to “spiral” around central columns (it was also much easier to carve the head-room that way).


Now I started working on the tower. This was a huge challenge for a lot of reasons, not least of them my own ignorance. Because I’d done my mosaic first (I wanted to make sure the entryway for the dig lined up correctly), I had to build the tower on top of the mosaic, without destroying the mosaic in the process. In practical terms, this meant I was building on top of the stairway down in the center of the mosaic. I wanted the tower to be “circular”, or as close as possible, with a minaret-style top (again, or as close as I could get). Given size constraints due to the mosaic, this meant external stairs up.

Anyway, I ran into a lot of bugs. Because the game won’t place templates on irregular surfaces even if they fit, I had to re-draw the entire tower by hand each time I restarted building it.

First attempt (I knew it was going south when they tried to build the roof first):

In retrospect, I think that was the slice bug, which I didn’t know about at the time.

Next,
http://images.akamai.steamusercontent.com/ugc/299860700362665821/036752B0E73EE07BA034E4014E24E1CAF79A7384/
So I had to cancel that build and reload because somehow it had destroyed part of my mosaic, and I couldn’t build it back for some reason.

Next I had a problem with workers building themselves into the center portions of the tower, or just getting stuck. http://images.akamai.steamusercontent.com/ugc/299860700362667499/809EA0DD11AF01338DAB141B4CECB021B3C6C074/
I could solve that by building ladders out, but it was really cumbersome. So instead, after placing all the floors, I
cut a three-by-three hollow in the floors of the center of the tower that I could place scaffolding/ladders through. I told myself it was a murder hole.

After that I had two more issues with pathing on the external stairs; first I tried to build them separately from the main tower but that didn’t work well at all (needed too many support blocks), next I made the mistake of building a two-wide path not realizing that meant a single-wide, i.e., too-narrow, corner turns, so I had to rebuild again with three-wide blocks pathway spiraling up.

Placing those blocks for the walkways was its own challenge because at the tippy top of the map the camera starts doing weird things and slewing around in crazy ways. But you do get some neat perspective shots. In the top left corner of this you can barely see two footmen fighting a stone golem, and you’re looking down_:

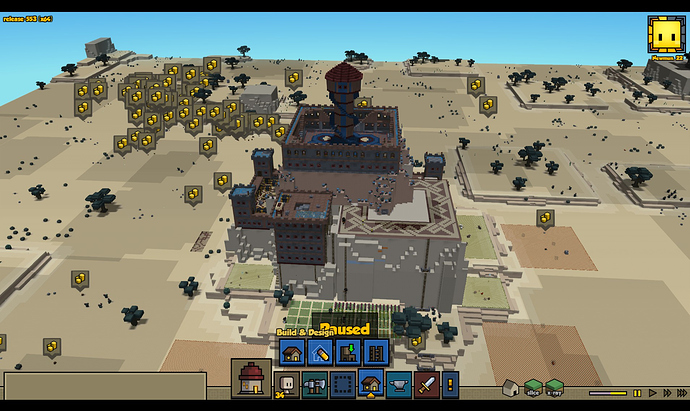
There was a final issue in that every additional change I made to the tower seemed to increase the amount of scaffolding required. Ultimately, building this (six story) tower took roughly 600 units of wood, entirely in scaffolding and ladders, which was a bit of an issue with Rayya’s and the primary reason building it took a month of game time (most of that was scouring every inch of the map for wood). Fortunately, after that nothing else has required remotely comparable amounts of wood so everything else is going more smoothly (and I got my carpenter up to level 3 almost entirely just from putting all the wood into log piles.)

Anyway, long story short, finally finished:

After that I wanted to surround the top of the mountain with an wall. Problem is you can’t build flush against the side of empty space, that way there’s no room for scaffolding. So I had to build a two-block-wide pathway all the way around the outside rim, build the fortress where I wanted it to go, then dismantle the pathway. This took a lot of ladders. Wgile the ladders were up, I took the opportunity to move a bunch of cactus flowers onto the various little rock-steps on the cliff faces.


And with that fortress finished and the walkway removed, that brings the exterior up to the present.

This is pretty much how the exterior looks right now:

As to the interior, It’s more complex:
http://images.akamai.steamusercontent.com/ugc/299860700362821744/5F83625C7E5298D5A6BB66C159C0CD23ACB9C484/
http://images.akamai.steamusercontent.com/ugc/299860700362822250/CD713A47157A64A028E0D886EFCB3A3A9D2F34C4/

Here’s a progression sequence of the carved-out space, moving down from the top:


The plan is to build a city of little normal sized houses inside the hollowed out mountain base. I should have room for a number of single story and even a few two story ledges. The exterior ledges will all get fortified. I still haven’t figured out exactly what I’m going to do for the two main exits and entrances (I’ve just been using a ladder up the sheerest cliff face); I know roughly where they’ll go but not sure how to carve them yet.

EDIT: Apologies for the links instead of in-line images; for some reason the forum software seems to only let me upload one screenshot (per post?).
SECOND EDIT: Inline images fixed! Though I skipped some because they were skippable.

16 Likes

Beautiful work :slight_smile:

1 Like

Thanks!

Next phase!

I realized that the first part of the city layout had to be a central plaza, and I wanted to have a water source in it. Unfortunately, of course, there was no natural water anywhere all that close to the rock, and what water there was, was in oases, halfway across the map, and at the same elevation – meaning that if I wanted the water to flow to my well, I’d have to dig much further down. Aaarg.

I decided to do a stepwell ( Stepwell - Wikipedia), both because it was flavor-appropriate and because I couldn’t think of any other way to do it, but I wasn’t sure how deeply i’d need to cut it because I wasn’t sure how the water flow mechanics would work / how much of the water would flow and fill in, etc. Figuring it out would take a lot of math, so instead I took a brute force approach and dug a test well and a test connector channel (“super speed” mode helped a lot here). From that I figured out I had to go at least 19 tiles deep, so allowing for a four-tile square in the center, that rounded to a nice 24.

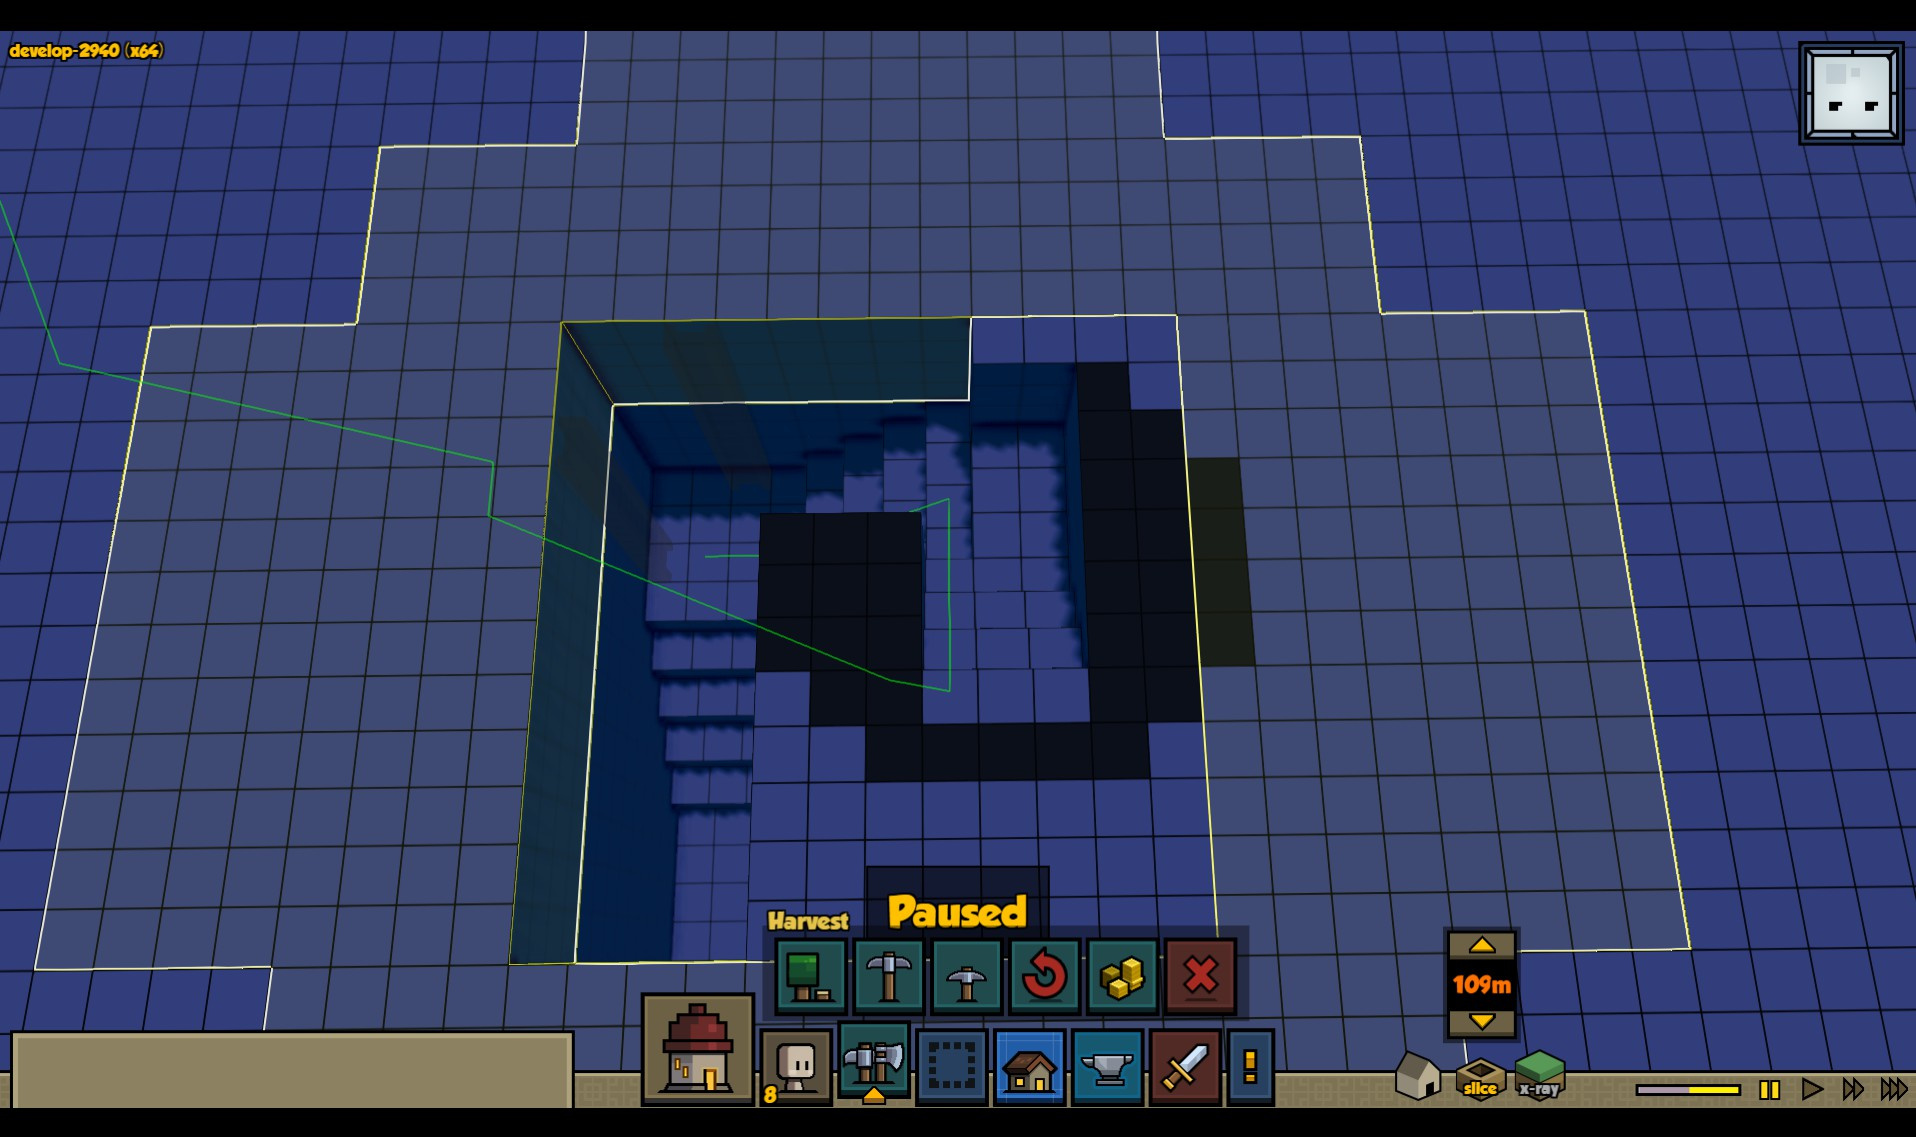
I used 12x12 stockpiles to measure off my square and just cut away one tile level at a time till I hit bottom.

Then I drew out the tunnel and started carving it from each end. As soon as it got to the central point, I stopped the dig, and set them to mine just a single tile away (old Dwarf Fortress security habits; I don’t want anything pathing up into the fort through my canal).

Unfortunately, one of my tunnel diggers died of starvation on the way back (he was moving slowly and wounded in the watery tunnel, and he just couldn’t path back to the fort in time for food. Not too bright, he pathed right by plenty of fruit bushes and even some lootable jerky etc)

Then I filled in the 12x12 stockpiles with some mosaics and I’ve got my plaza (they may be placeholder designs for now, we’ll see; I also may tile the stairstep itself but that’s gonna be a challenge).

3 Likes

Ok, next update: I built this city!

I also figured out how to post more than one screenshot per post, so this update will be a little better illustrated.

The next big puzzle was how to design and layout the actual city itself. I wanted it to feel like an actual little town, with varied buildings, but I wanted a certain amount of uniformity too (buildings in a single location tend to follow the same sorts of styles). I also didn’t want to use a streets/blocks type layout because I feel like 1) that’s been done 2) a lot of medieval towns were a lot more haphazard and less structured and 3) I didn’t really have the space for it given the irregularity and limited size of the carved cavern.

Anyway, first thing I did was just stare at the space I had for a while. I decided to go ahead and use the repeating-pattern 12x12 square I’d drawn out to cover as much of the rest of the available area as I could, just to see how it looked.

Not perfect, but interesting enough I felt, and a different choice than just streets and city blocks.

So next was building all the actual buildings. This was a real puzzle but eventually I had what I felt was a flash of genius (with a helping hand from a certain Russian mathematician).

I managed to put together 12 or so basic designs that were nice and varied but that I think I’ll be able to reuse in future fortresses. I expect most of you can spot the gimmick:

Again, from the top down, external first:

Overall it was actually a lot of fun trying to fit as many of them as I could into the available space in a way that was aesthetically pleasing etc. One thing I learned while placing them: underground, you need two walkable tiles around each building, not just one; too close to a wall and buildings won’t be completable.

Theoretically, all of these have the same walkable surface area (four 8x8 tiles), but in practice the multi-story ones are worse, because more of that space is stairs. Most buildings took about a day to build, but there was some variation and some took as long as three days (for reasons that didnt’ seem explicable – it wasn’t just height or anything I could spot easily). I used 8x8 “tiles” as the basic unit of size so that each tetromino building would fit nicely within the 12x12 mosaic tiles while leaving walkable space around them (the game’s reliance on 4x4 mining blocks kinda forces the use of designs based on multiples of 4 when doing underground building). I didn’t use decorations or furniture in the templates since those can be individually placed later, just doors and windows; each building got a two-block-high foundation so that I could place them safely on the mosaic without messing it up. I tried to match the colors as closely as possible to the tetromino colors (though some, like green, weren’t available), but used red clay roofs and red stone columns throughout so there would be some commonalities of style.

Here are the building templates for anyone who wants to reuse them. This includes some earlier versions of some of them that are either slightly buggy or that weren’t oriented correctly for the space I had available. You may need to add front steps to a couple of them, and there are a couple of “missing” tetromino orientations I didn’t bother plotting out.

tetris templates.zip (555.0 KB)

Next step will be adding detail work and furniture placement to the city, then moving on to the exterior and finally carving out the main entrance and front defensive works. I may wait on that till Alpha 16, so we know a little better how archers work.

Calendar-wise I think I’m at roughly day 10 of Feastmun at this point.

7 Likes

Wow, great work so far!

incredible, always was thinking if it was possible to build large inside a mounting. This is amazing

Minor update:

Didn’t get much done this weekend but played around a bit with design and game physics.

First thing was I decided I was slightly unhappy with the water level in my stepwell:

I’d like it to be a little higher, so there’s no ladder element. Problem is I didn’t want to dig any deeper. So I decided it was worth it to try “filling in” the oasis I was draining from, and some of the water conduit, to see if that made a significant difference. (The tunnel can only be filled in so much, given the 3x2 hearthling size limitation).
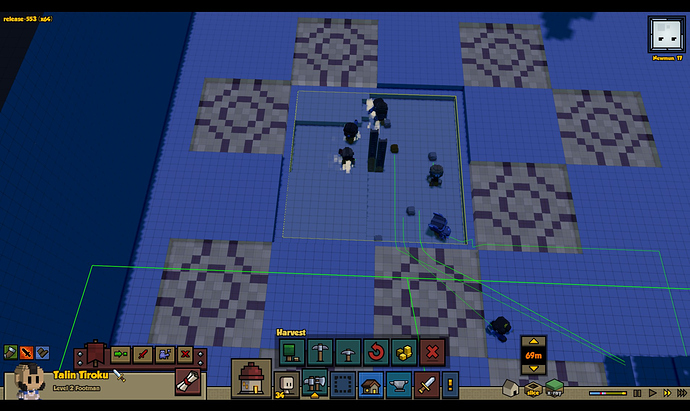
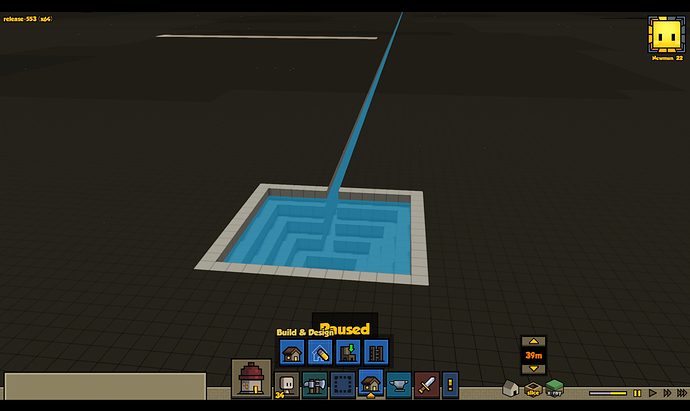
The work did make a slight difference:

But not as much as I was hoping, and it was taking a lot of hearthling time (as well as doing really weird things to enemy spawn points, due to all the way-far-away construction) and so I decided to put this particular project on standby.

The next thing I wanted to do was to cover the remaining open surfaces – including the stepwell itself-- with more mosaic designs. This is actually pretty complicated for more reasons than you might think.

I’ve been doing has been taking various little patterns from Morroccan Zellige (and, oddly, cross stitch “blackwork” patterns, which also work well) and trying to put them into the game as pixel art designs (that’s how I got the mosaic pattern from the last big post).

Aaaanyhoo. I’m still working on a 24x24 pattern for my stepwell. What I have at the moment is this:

But I’m not happy with it because from the side it looks like a hot mess:

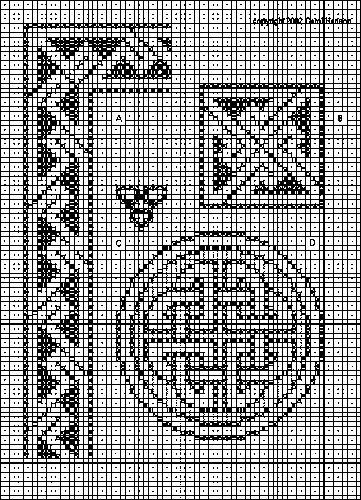
In the meanwhile i’m working on patterns for the exterior fort ledges. For these I’ve mostly gone back to looking at cross-stitch patterns, as I mentioned above. This pattern in particular has been really fruitful:

I’ve already done the big interlocking circle design and the small square in prior forts, but the border seems useful, and with a little work, I can turn it into a nice walkway / corner design, and turn those sections into a completed square, as here:

8 Likes

Update:

I haven’t updated in a while because I’ve been reworking this from the ground up (or, rather, down!) for the new alpha (the existing version had a number of design flaws I wanted to change - staircase took up too much room, etc.) and with a new computer/faster processor that let me run more hearthlings than before. Still, though, all that took a while and was essentially re-treading ground already covered, but at this point I think I’ve caught up closely enough that it’s worth an update.

One major change was reorganizing how the main staircase and the surrounding dome was hollowed out. This had to be done first due to a sort of order-of-operations with building on top of areas you’re going to hollow out; if you want building foundation stones to be ceilings of caverns, you have to place the building first, then hollow out the cavern (but not too deep to the point where it takes crazy scaffolding amounts!) then build, otherwise you either won’t be able to place the foundation stone or won’t be able to dig out around and beneath it.

I also wanted to change the type of staircase to one that used up less footprint – the descending grand staircase model took up lots of building room – and that meant shifting to a spiral pattern, which took a little work to figure out how to dig correctly, especially since I wanted to get it aligned with the 4x4x(4/5) block grid for ease of digging. I also wanted to get the cavern “dome” aligned more precisely with that same block grid and with the large 32x32 map “tiles”. (I used some online guides to make everything fit progressively wider and wider “circles” going down, eventually turning into squares as I hit the edges).

So, this is how I did it:

After a bit I turned it from a single into a double spiral staircase, digging out access bridgeways at various points where I wanted doors:

While I was doing that, I also re-built and expanded the exterior fortress walls. Most of these are too high up to really be useful – it turns out archer arrow range is too short for walls this high – but, hey, they looked cool. Used the same technique as before of building little stone sub-platforms around the edges cliffs so that I could build the main structure right up against the edge of the cliff face:

Once I got the digging down to where I wanted my internal “ground” level to be, I had to re-do the stairstep well design from before. One major problem I had before was that I couldn’t get the water to rise up in the well like I wanted. Turns out, there was a reason for this; in game, water will not rise above the “edge” level of a lip of stone or earth, for some reason:

As you can see, the water is a block lower on the right hand side of that screenshot than it is on the left, even though the two tunnels are connected, because there’s a lip edge on the water to the right keeping the level lower.

So instead I decided to dig straight down, then over with no lip, let the water flow through, then dig the stairsteps, like so:

This worked like a charm and I got the stairstep-well effect I wanted:

And this is how the fortress of New Maratas stands at the present moment:

And from the top down, internally:


And in the side view:

So that’s where things are at present. Next will be the walls around the base, some entry way staircases (the entrance will be on the “second” tier up) and then the internal Tetris-style houses will be replaced (I should be able to fit significantly more of them).

All this was on hard mode with a large military, so it took longer than before (as you may be able to tell from the dates on some of the screenshots). I think I’m in Newmun now?

11 Likes

still as amazing as ever. What is your current sytem spec?

2 Likes

Thanks!

This is the new setup:

Operating System
Windows 10 Pro 64-bit
CPU
Intel Core i7 6700K @ 4.00GHz 49 °C (overclocked to 4.4)
Skylake 14nm Technology
RAM
16.0GB Single-Channel Unknown @ 1066MHz (15-15-15-36)
Motherboard
ASRock Z170 Extreme3 (CPUSocket) 33 °C
Graphics
2047MB NVIDIA GeForce GTX 660 Ti (EVGA) 78 °C

Essentially I upgraded everything except the video card, given that the new 1080’s/1070’s are coming out over the next month so there would have been no point. Even this build gets some significant lag in certain situations (mining large areas), and going into triple speed mode tends to make hearthlings forget what they’re doing, but the game is still playable with a much larger population than it was before.

3 Likes

Verry verry impressive work :slight_smile:

Oh just to update everything –

This particular version of this town is probably dead at least for now – basically too many alphas happened while I was distracted with other things, and now I’d want to redesign everything from the ground up to take into account things like turret placement and so forth. It is very likely that I will re-use this seed or a similar seed in future forts, however, so expect to see more versions of this same basic design in future. Thanks for all the positive feedback!

1 Like

Really cool tower love the spiral around it :slight_smile: